📥 How to Set Up Requests in DealTrail Task System
This guide explains how to set up and use the request functionality in the DealTrail Task System. Follow these steps to create request boards, set up categories, create forms, and manage both internal and external client interactions.
Creating a Request Board
1. Navigate to Your Account
Log in to your DealTrail account and access the project dashboard.
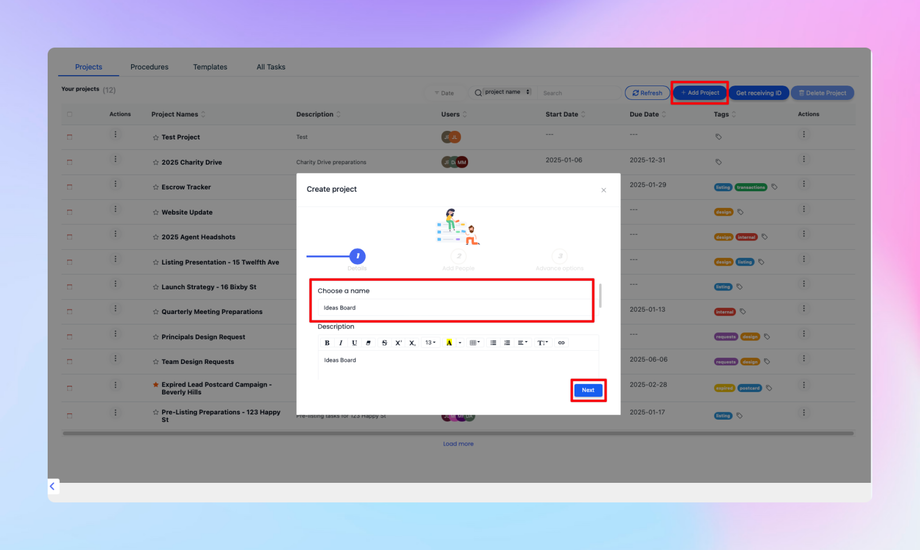
2. Create a Project
• Go to the relevant section and create a new project.
• Name the board based on its purpose, such as Ideas Board or Feature Requests.
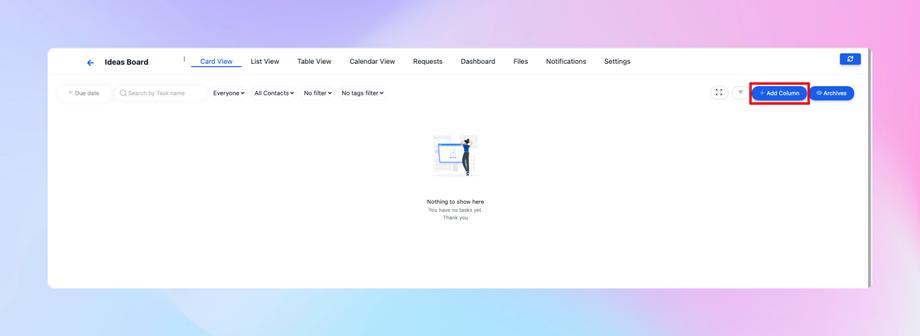
• Set up columns for the workflow stages, e.g.:
• Ideas → Started → Considered → In Progress → Review → Completed.
3. Customize Project Stages
• Add any additional stages that align with your workflow.
• Ensure the stages reflect your process for managing requests.
Configuring Request Categories
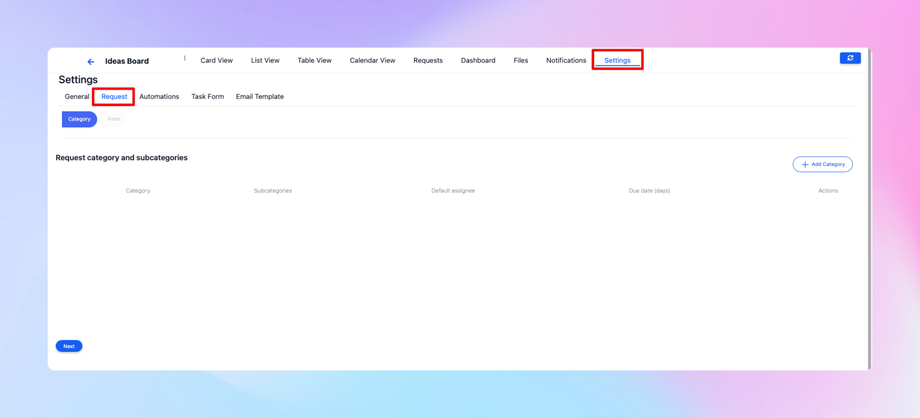
1. Access Request Settings
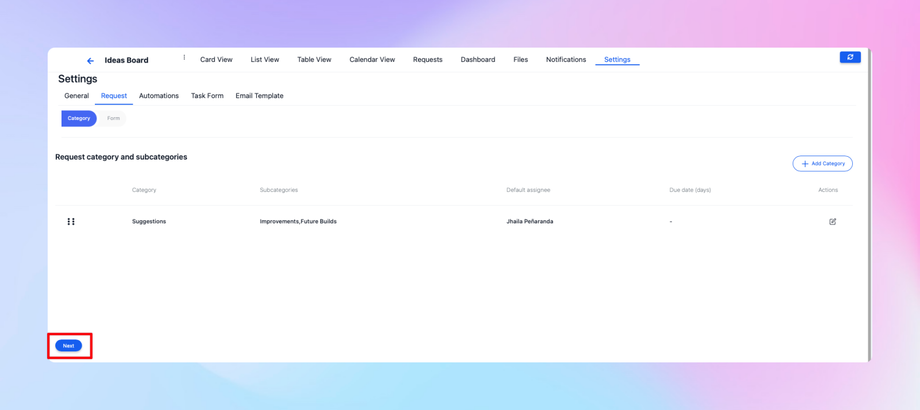
• Navigate to the Settings > Request section.
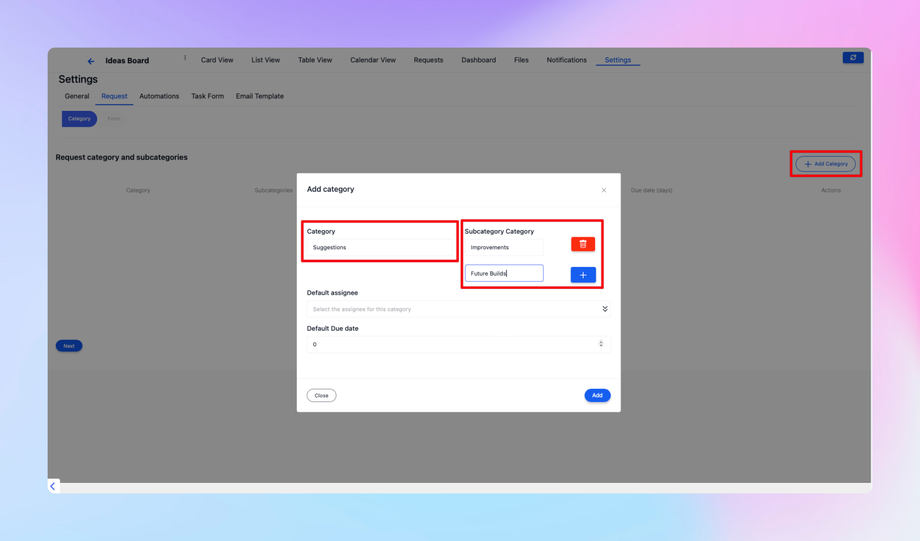
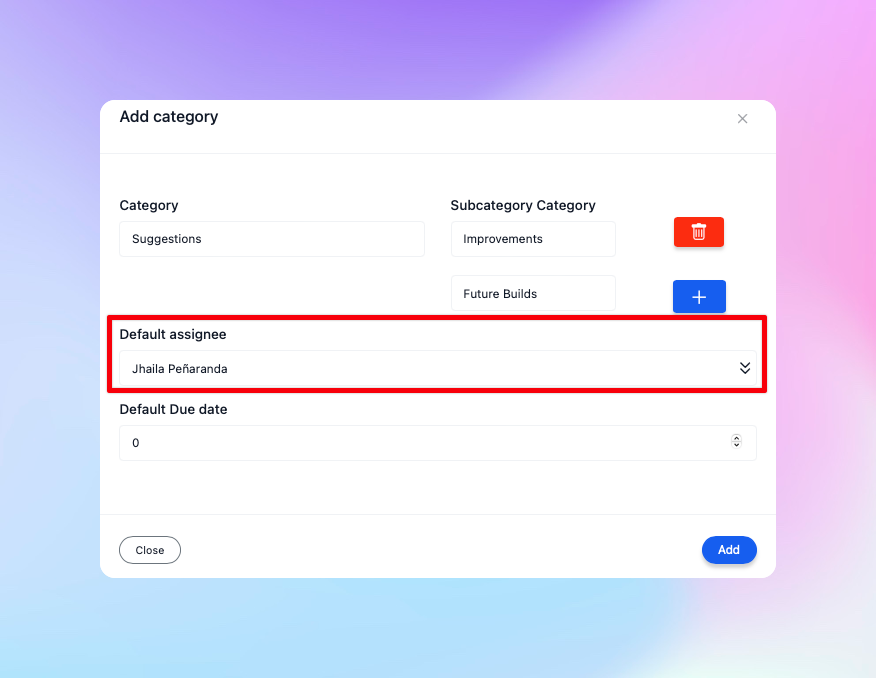
2. Add Categories and Subcategories
• Create categories (e.g., Suggestions).
• Add subcategories under each category (e.g., Improvements, Future Builds).
• Assign team members to manage specific categories or subcategories.
Creating and Managing Forms
1. Build a Form for Requests
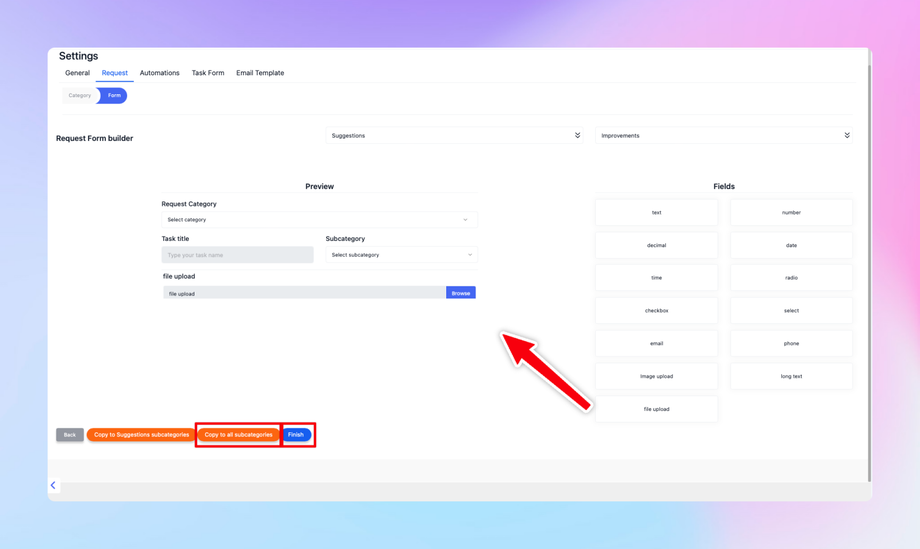
• Go to the form builder and create a new form for requests.
• Add the following fields as needed:
• Title: Required.
• Subcategory: Dropdown linked to your subcategories.
• Description: Required text field.
• File Upload: Optional field for attachments.
• Loom Video Link: Optional field for video submissions.
2. Copy Form Across Subcategories
• After creating the form, copy it across all subcategories to ensure consistency.
Linking Requests to Subaccounts
1. Generate External Links
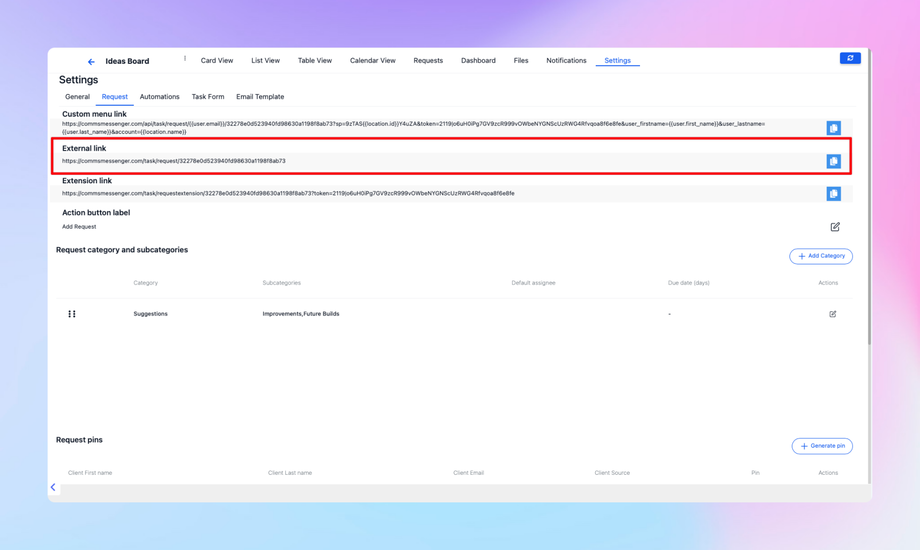
• After setting up the board and forms, generate an external link for the request system.
• This link allows clients or subaccounts to submit requests without accessing the full DealTrail platform.
Handling Client Submissions
1. Internal and External Comments
• Internal Comments: Visible only to your team.
• External Comments: Visible to the client. Mark comments as external when sharing updates with clients.
2. Tracking Progress
• When a request is submitted, it will appear on your board.
• The client can track progress through the stages (e.g., In Progress → Review → Completed).
3. External Clients
• Use the external link to allow non-DealTrail clients to access the request system.
• Secure the link with a generated PIN tied to the client’s name and email.
External Link and PIN Access
1. Generate a PIN for External Clients
• Go to the external link section and generate a PIN for the client.
• Provide the client with the link and their unique PIN for access.
2. Client Dashboard
• External clients can use the link and PIN to view their personalized dashboard.
• The dashboard will display requests and their progress.
Best Practices
• Naming Conventions: Use clear and descriptive names for categories and boards.
• Consistency: Ensure all subcategories share the same form for uniformity.
• Security: Always use secure external links with PIN protection for external clients.
• Communication: Use internal and external comments effectively to manage client expectations.


