📈 Customizing Opportunity Settings
The Opportunities & Pipelines section in DealTrail helps you track and manage sales and customer interactions through a visual workflow. Pipelines organize the stages of your sales or service processes, while Opportunities represent individual leads or deals.
1. Understanding Pipelines and Opportunities
• Pipelines: A series of stages that reflect the progression of a lead or deal, such as Lead Captured → Contact Made → Proposal Sent → Deal Won. Pipelines can be customized for different workflows or departments (e.g., Sales, Client Onboarding).
• Opportunities: Represent a single lead, deal, or task within a pipeline. Each Opportunity is associated with a contact and moves through the pipeline stages as it progresses.
2. Custom Opportunity Settings Overview
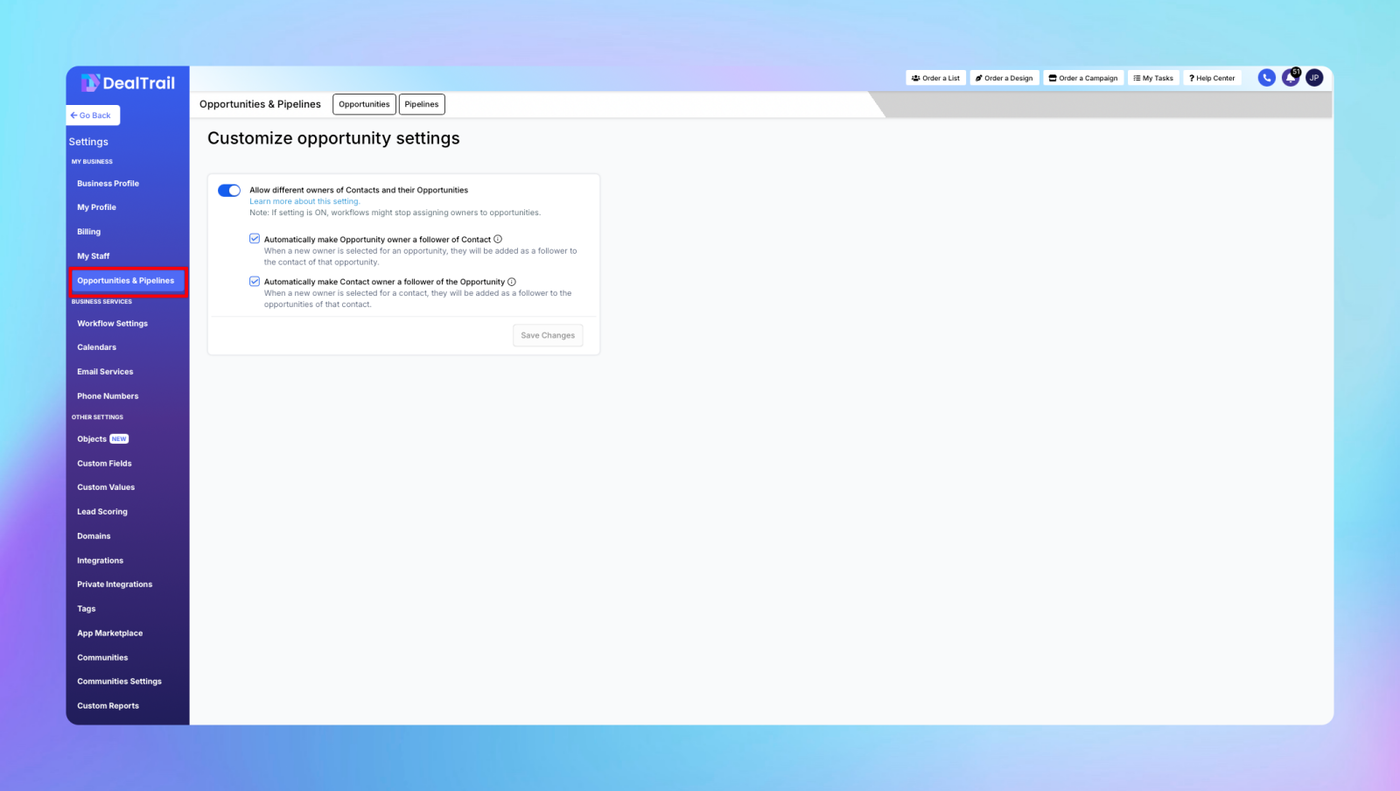
1. Allow Different Owners of Contacts and their Opportunities
• When enabled, this setting allows a contact to have a different owner than their associated opportunity.
• Note: If this setting is turned on, workflows might stop automatically assigning owners to opportunities.
• Use case: This is useful if you want to split ownership responsibilities, such as one person managing the contact relationship and another handling sales.
2. Automatically Make Opportunity Owner a Follower of the Contact
• When a new owner is assigned to an opportunity, this setting adds the owner as a follower of the contact tied to the opportunity.
• Purpose: This ensures the opportunity owner is always updated on the contact’s activity.
3. Automatically Make Contact Owner a Follower of the Opportunity
• When a new owner is assigned to a contact, this setting adds them as a follower to all the opportunities associated with that contact.
• Purpose: This ensures the contact owner has visibility into all associated opportunities.
4. Save Changes
• After making changes to these settings, click the Save Changes button to apply them.
How to Use These Settings
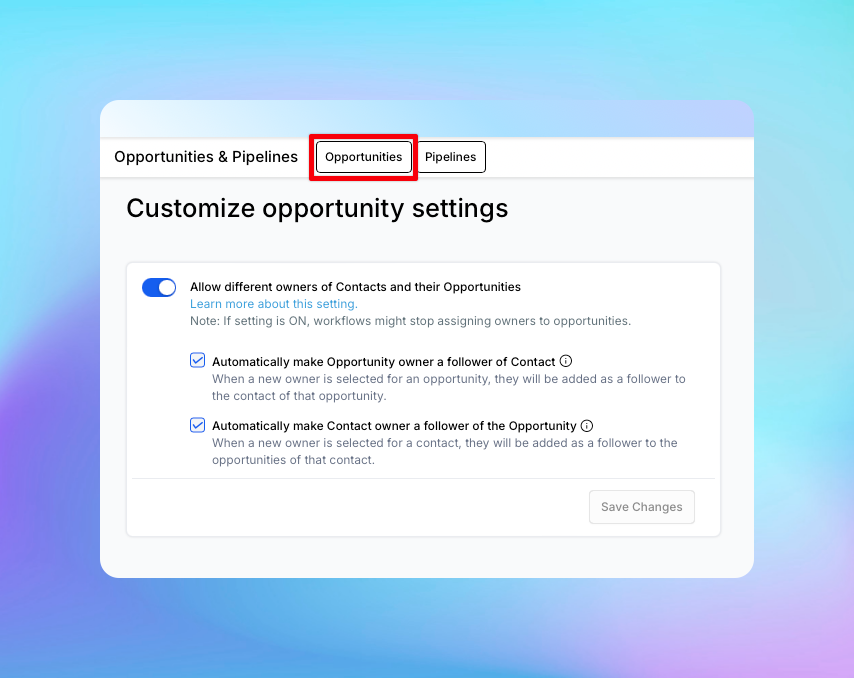
1. Accessing the Page
• Navigate to Settings > Opportunities & Pipelines > Opportunities.
2. Configuring Ownership Rules
• Toggle the settings to match your organization’s workflow:
• For example, enable different owners if contacts and opportunities are handled by different team members.
3. Enhancing Collaboration
• Use the follower settings to keep owners informed about all related activity:
• Opportunity owners can stay updated on contact details.
• Contact owners can monitor sales progress.
Best Practices
• Consistency: Ensure your team understands the ownership model being used to avoid confusion when assigning contacts and opportunities.
• Automation: Pair these settings with workflows for assigning owners, ensuring seamless and automated processes for assigning contacts or opportunities to specific team members.
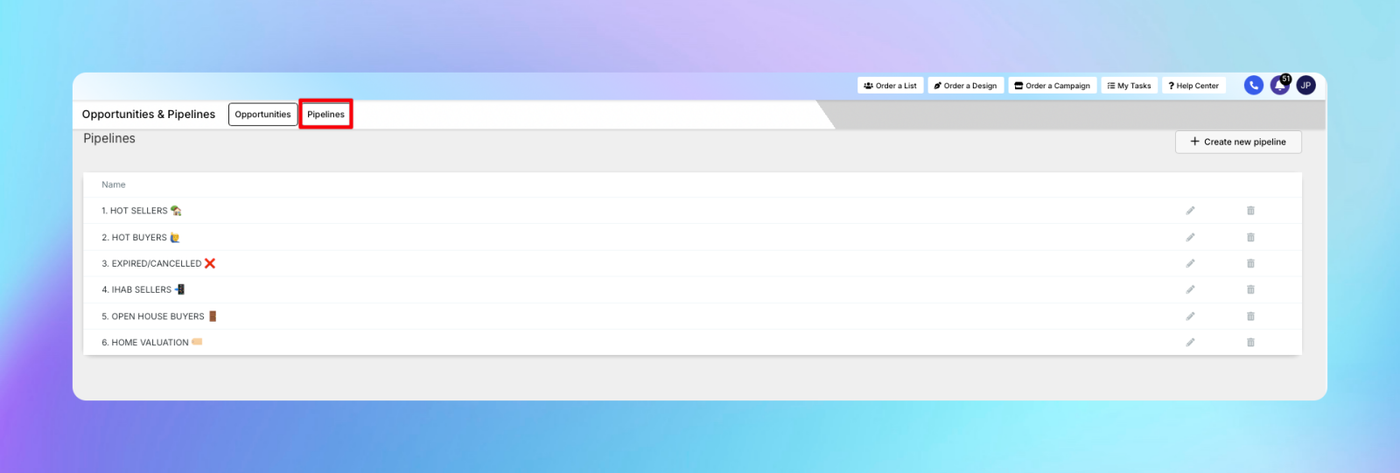
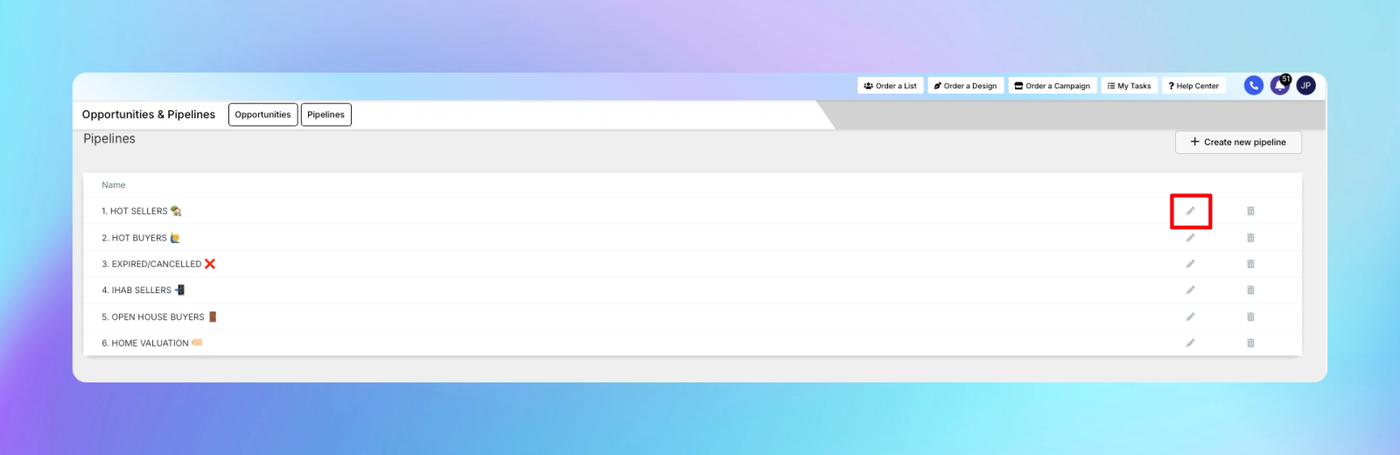
3. Managing Pipelines
Purpose: Create, edit, and manage sales workflows.
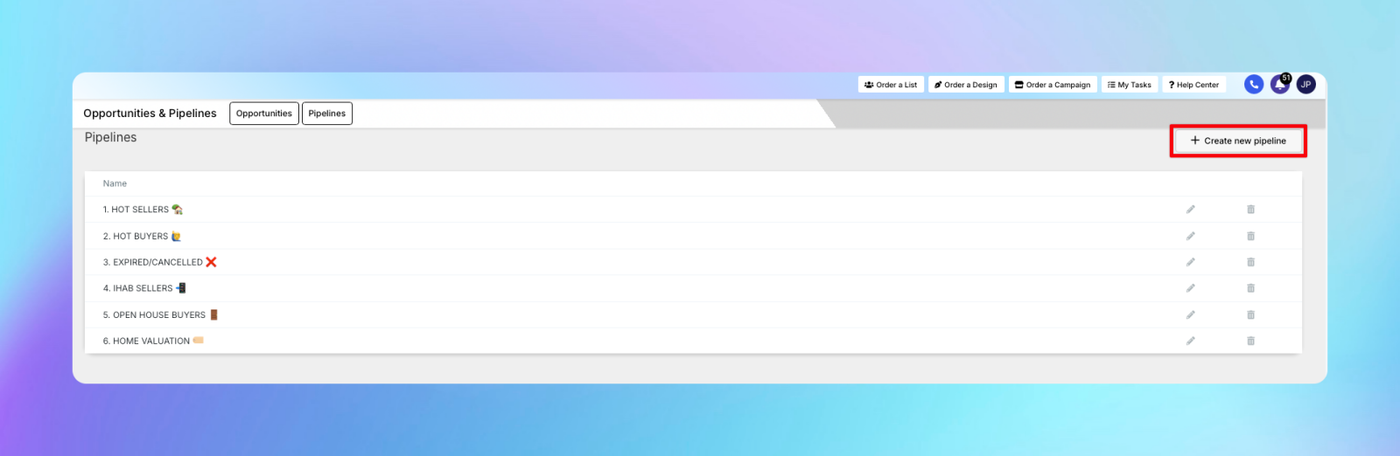
Steps to Create a New Pipeline:
1. Navigate to Settings > Opportunities & Pipelines > Pipelines
2. Click Create New Pipeline.
3. Enter the following details:
• Pipeline Name: Use a descriptive name (e.g., “Sales Pipeline” or “Onboarding Process”).
• Stages: Add and name stages to reflect your workflow. Example stages:
• New Lead
• Contacted
• Proposal Sent
• Closed Won / Closed Lost
4. Arrange the stages in the desired sequence.
5. Click Save.
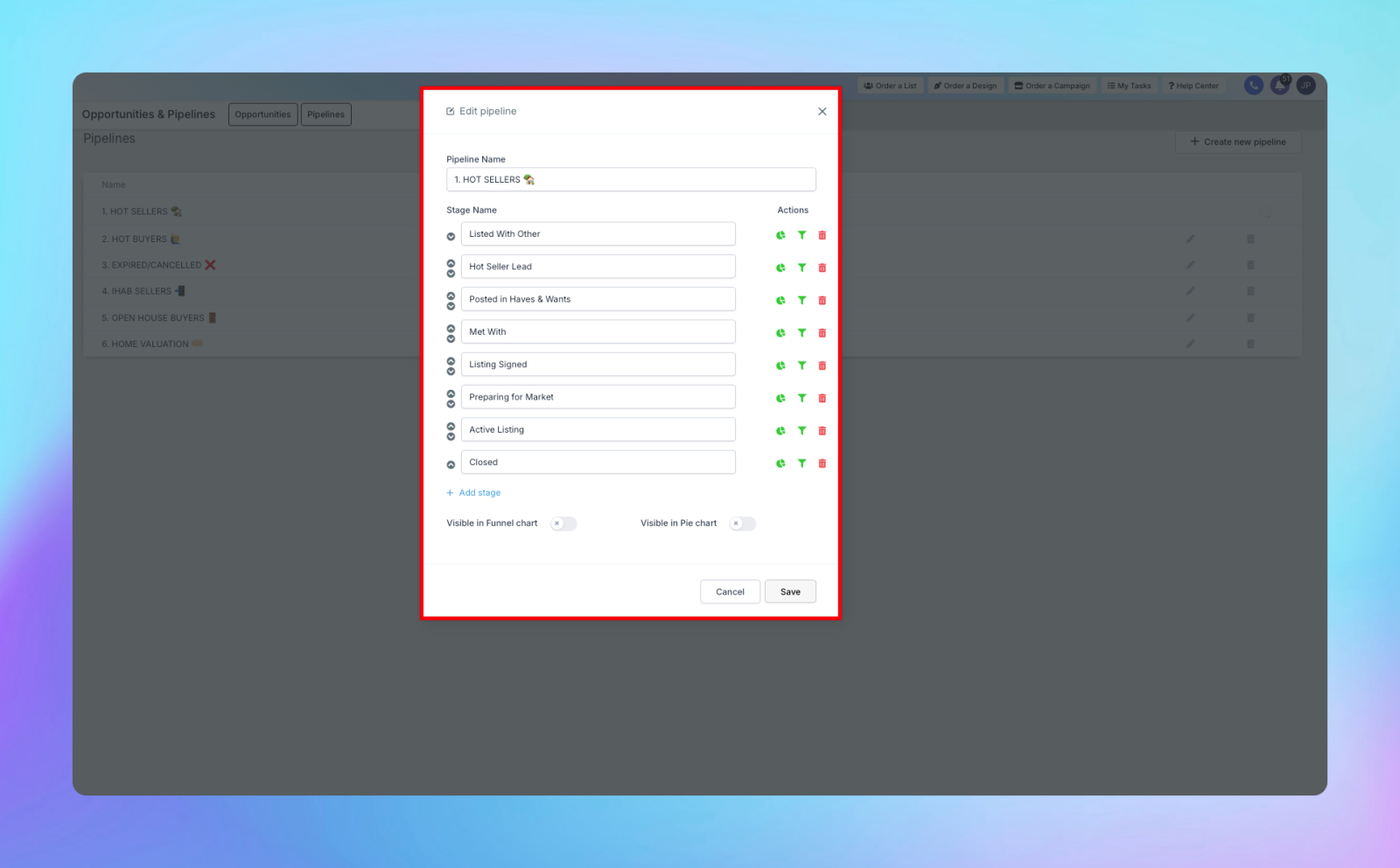
Steps to Edit an Existing Pipeline:
1. Under Settings > Opportunities & Pipelines, select the pipeline you want to edit and click edit button.
2. Adjust stage names, add/remove stages, or reorder them using drag-and-drop functionality.
3. Click Save Changes.
Best Practices for Pipelines:
• Use consistent stage names across pipelines to avoid confusion.
• Keep stages actionable and easy to understand (e.g., “Follow-Up Required”).
• Limit pipelines to specific teams or processes to maintain focus.
4. Automating Pipelines and Opportunities
Purpose: Streamline lead management and improve efficiency using automation.
Using Workflows with Pipelines:
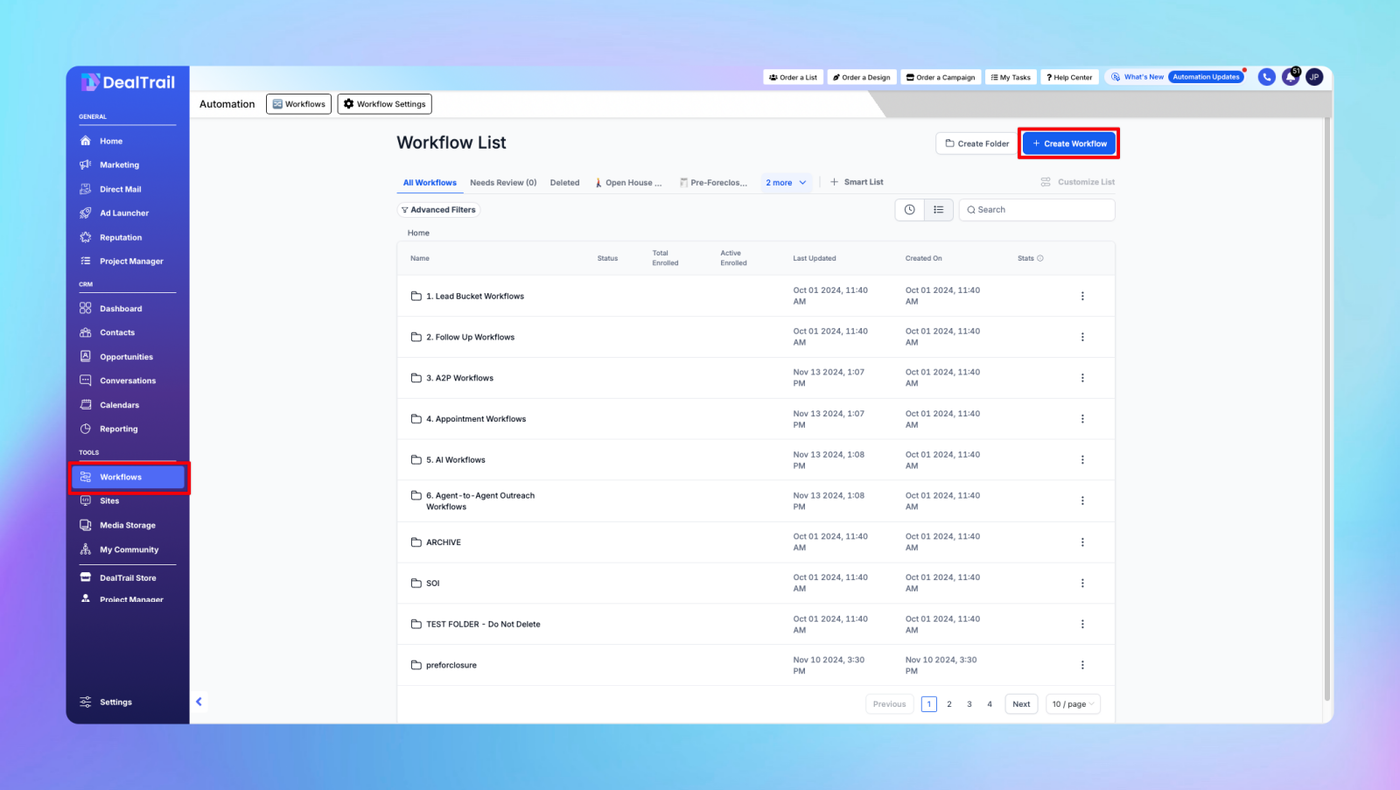
1. Go to Workflows > Workflows and create a new workflow.
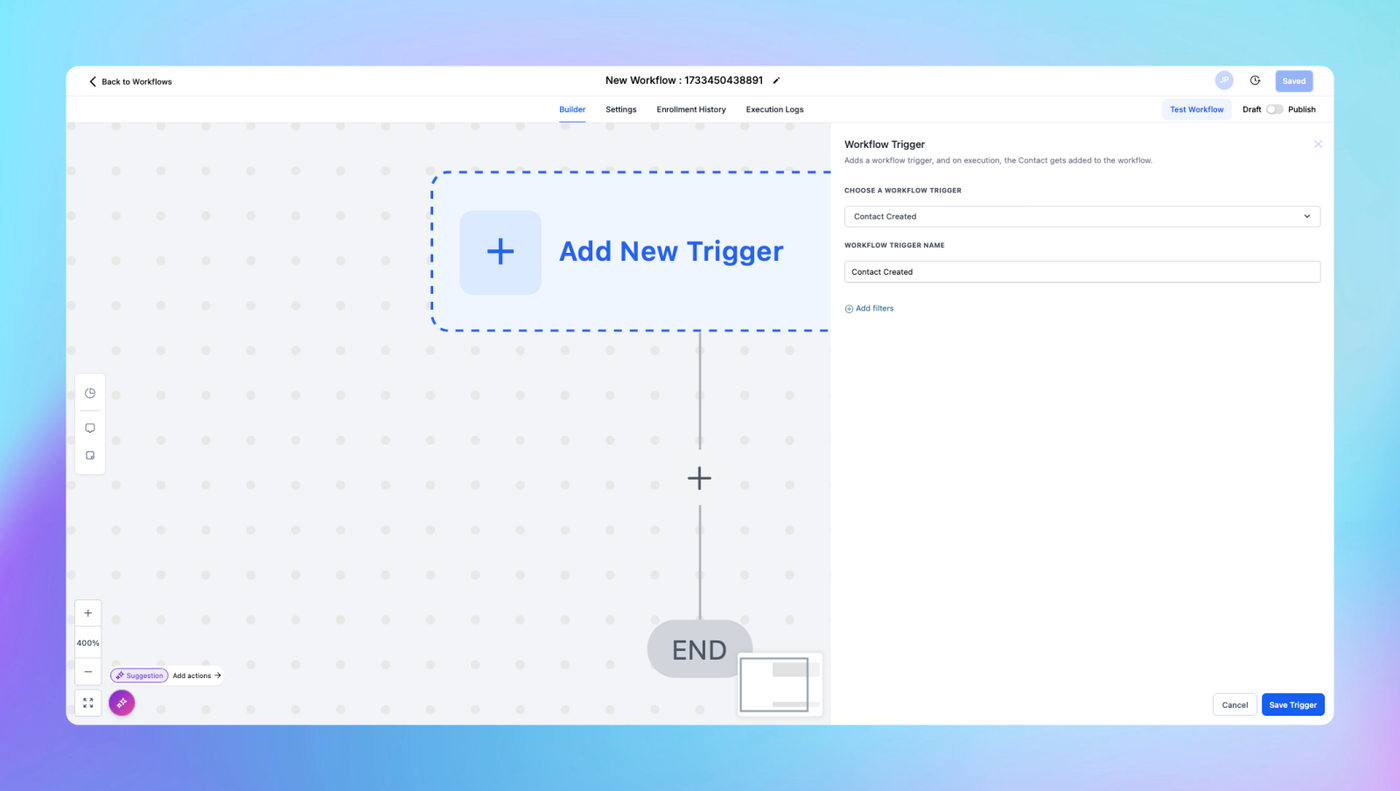
2. Set triggers such as:
• Form Submitted: Automatically create an opportunity in the pipeline when a lead submits a form.
• Contact Created: Add contacts to the pipeline when they are imported or created.
3. Add actions like:
• Create Opportunity: Automatically add an opportunity to a specific pipeline and stage.
• Update Opportunity: Move the opportunity to a new stage based on criteria like email opened or a call scheduled.
4. Test the workflow to ensure opportunities move through the pipeline as intended.
Notifications for Opportunity Updates:
1. Under Settings > Notifications, enable alerts for:
• New opportunities assigned.
• Opportunity status changes.
• Follow-up reminders for stagnant opportunities.
FAQs
1. Can I assign multiple pipelines to one team?
• Yes, pipelines can be shared across teams, and opportunities can be assigned to specific users.
2. How do I track the performance of a specific stage?
• Use the Opportunities Report to filter by pipeline and stage, then analyze the metrics.
3. What happens to opportunities when a pipeline is deleted?
• Opportunities are retained but are no longer associated with the deleted pipeline. Reassign them manually to another pipeline.
4. Can I create custom fields for opportunities?
• Yes, go to Settings > Custom Fields to add fields like Industry or Lead Source for more detailed tracking.
5. How do I set up reminders for follow-ups?
• Use workflows or manual tasks. For example, create a workflow that triggers a reminder email if an opportunity remains inactive for 7 days.