💬 How to Add the Chat Widget to Funnels and Websites
Installing the DealTrail Chat Widget on client websites is one of the easiest ways to generate leads without ad spend.
The Chat Widget supports Live Chat (useful for companies with sales and support teams read to respond right away), SMS messaging, and WhatsApp messaging (if enabled on the account).
In any case, the Chat Widget installation is simple and requires no development knowledge or technical skills.
How to Build a Workflow for a Web Chat Widget
This guide will walk you through creating a workflow to handle web chat widget submissions on a client’s website. The workflow will notify users and handle incoming messages from the chat widget.
Step-by-Step Guide:
1. Access Workflows
• After activating or installing the web chat widget on a client’s website, navigate to the Workflows tab in the sub-account where the widget is installed.
• Click on Create Workflow and select Start from Scratch.
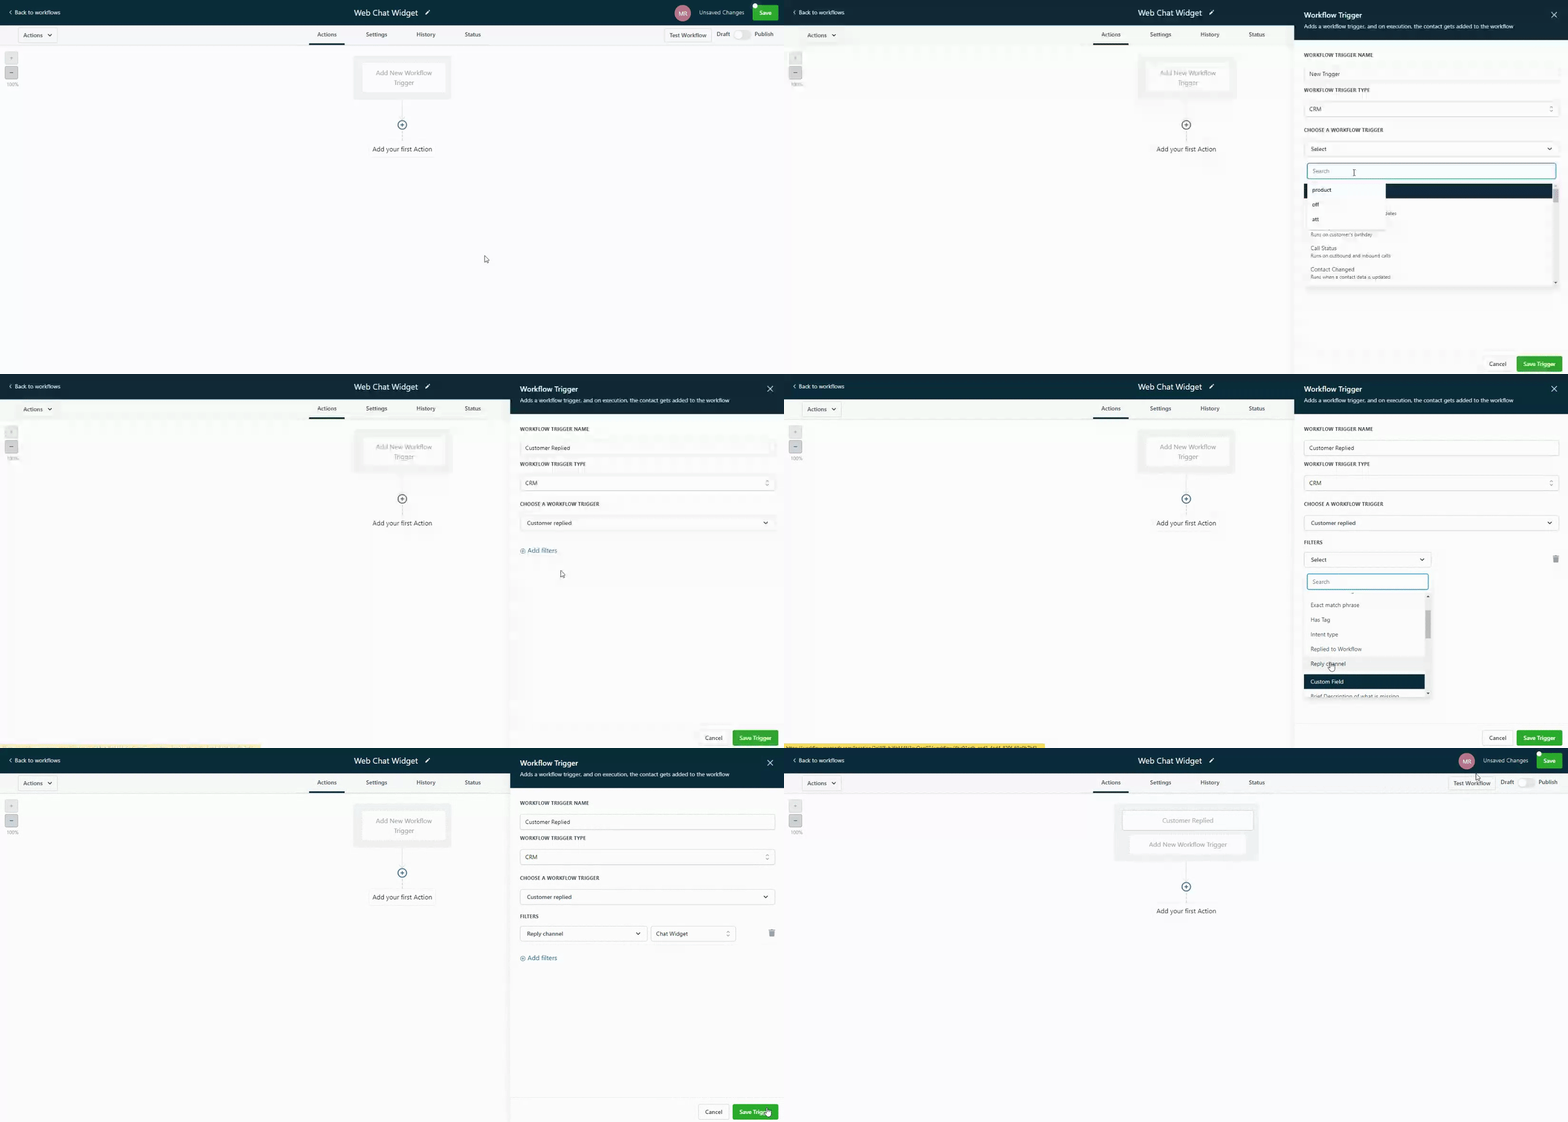
2. Set Up a Trigger
• Choose the trigger type Customer Replied.
• Filter by the specific channel, in this case, Web Chat Widget.
• Apply additional filters, such as a specific phrase, if needed. For simplicity, we’ll skip this step for now.
• Click Save Trigger and rename it to something like “Chat.”
Every "Reply channel" will require its own respective trigger. For the example above we are only using "Chat Widget", if you wanted to use Google Messages you would need to setup a NEW trigger and or workflow for that specific event.
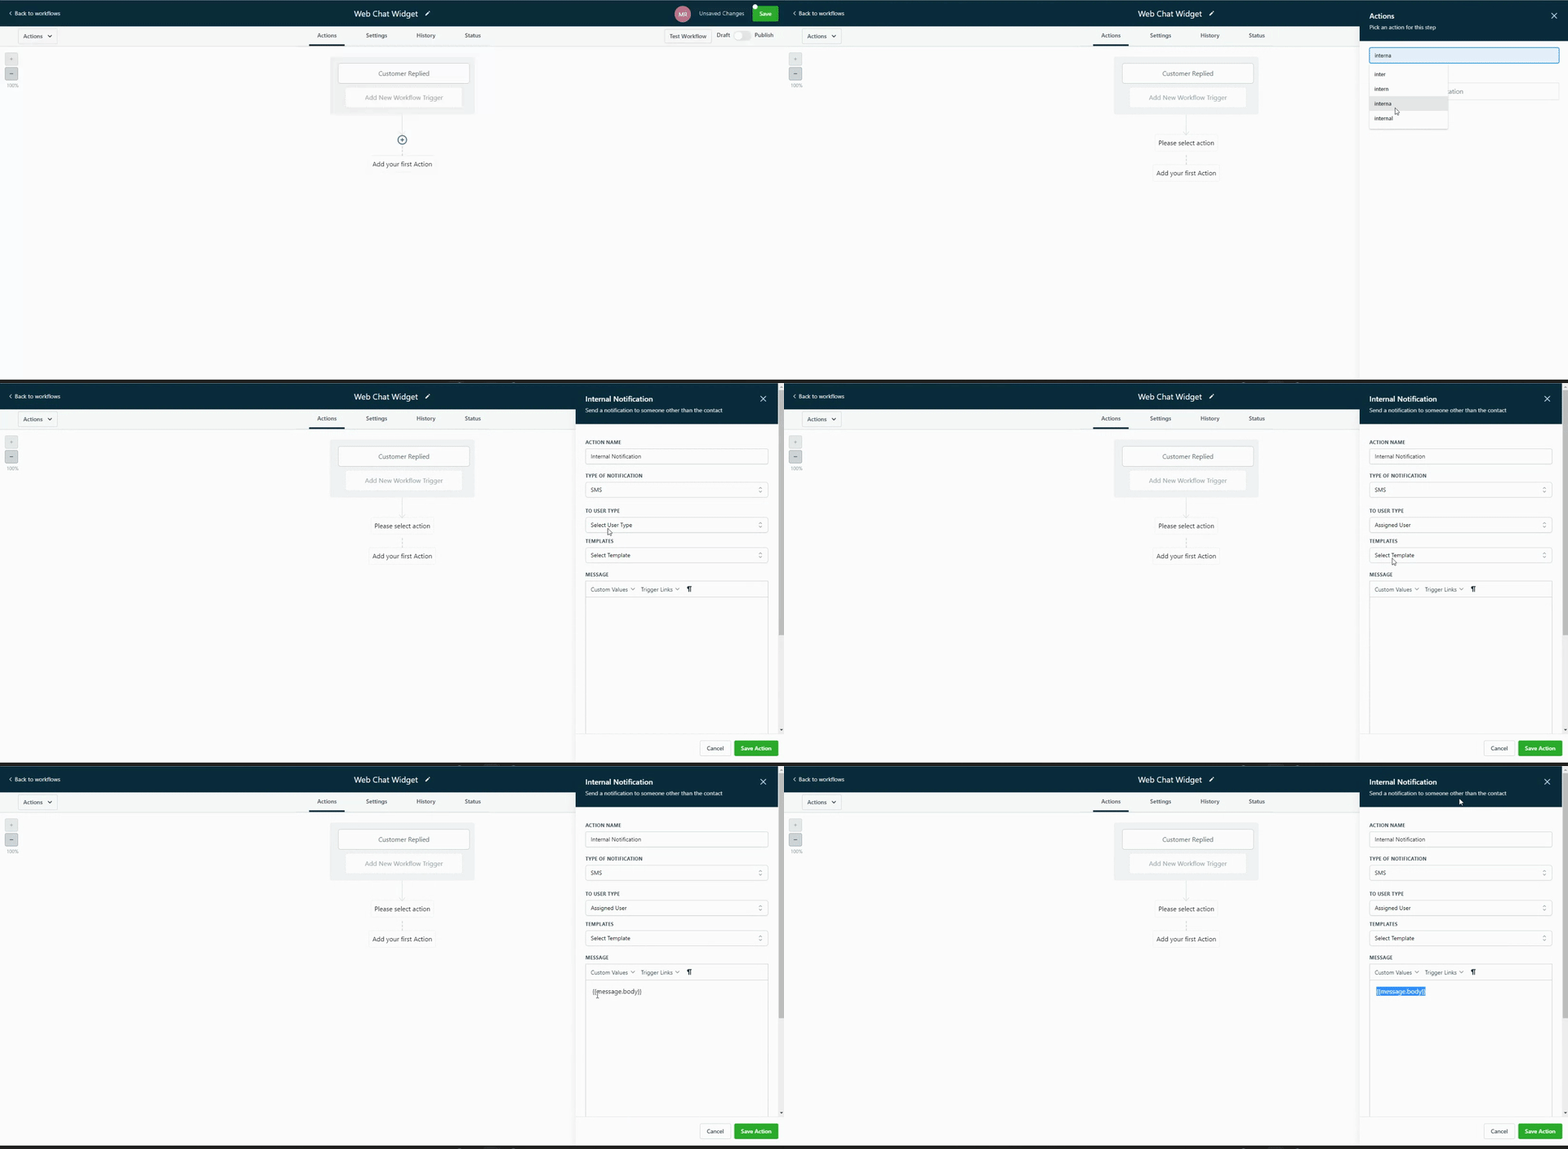
3. Configure Internal Notification
• Next, add an action to notify the internal user when a chat widget submission occurs.
• Select Internal Notification as the action type. You can select from 3 options:
1. Email - Send email to a specific Users or custom email
2. In-app notification - Send a notification via the web app or mobile app to a specific Users or all
3. SMS - Send SMS to a specific Users or custom number
• For this example, we’ll use an App Notification.
• Enter a title such as “Web Chat Widget Submission” and fill in custom values based on the chat form fields, such as the customer’s name and message then Save this action.
Quick Tip: Use the "{{Message Body}}" custom value in your notification email/text to display the message that the user entered into the chat widget.
4. Redirect Upon Notification
• Select the redirect page for when users click on the notification. This could be:
• Contact Page
• Conversation
• Opportunity
• For a chat submission, it makes sense to redirect to Conversation so that the user can reply to the lead directly.
• Specify which users will receive the notification (single or multiple users).
• Click Save.
5. Notify the Customer via SMS
• Optionally, add an SMS action to notify the customer that their message has been received.
• Use a custom message such as: Hi {{contact.first_name}}, thank you for your message! Someone from {{business.location_name}} will contact you shortly.
• Ensure that a valid phone number is configured to send the SMS. Without a phone number, the SMS won’t be sent.
6. Publish the Workflow
• Click Publish to make the workflow live.
Conclusion:
By following these steps, you’ve set up a workflow that automatically notifies users of web chat widget submissions and optionally sends an SMS to customers. This process ensures timely responses to incoming messages via the chat widget.


