📧 Email Services
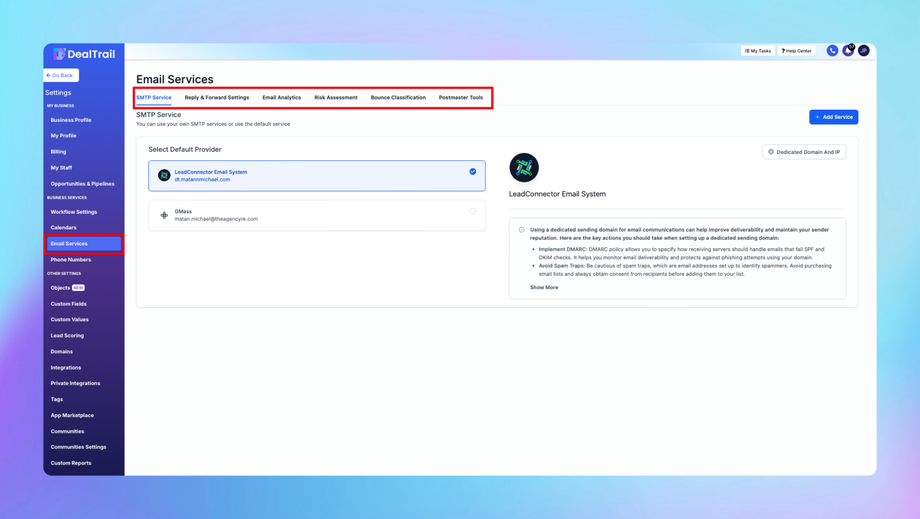
This guide provides a comprehensive overview of Email Services under Settings in DealTrail, specifically focusing on:
1. SMTP Service
2. Reply and Forward Settings
3. Email Analytics
4. Risk Assessment
5. Bounce Classification
6. Postmaster Tools
1. SMTP Service
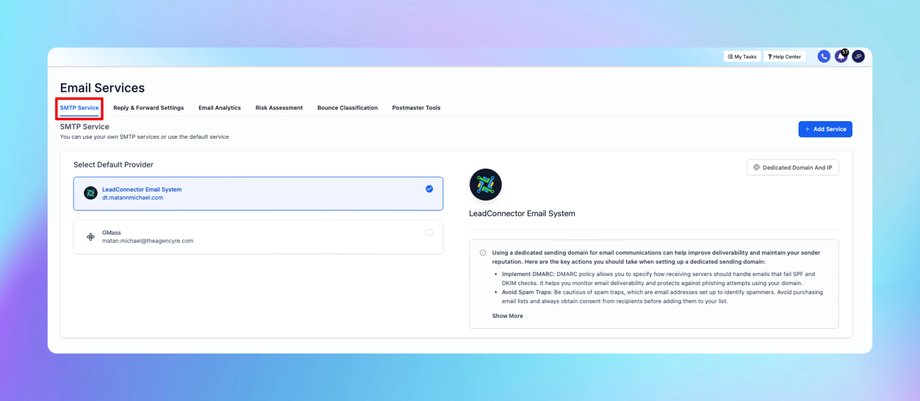
SMTP Service allows users to configure outgoing email settings for sending transactional and marketing emails.
Configuration Steps:
1. Access SMTP Settings:
• Navigate to Settings > Email Services > SMTP Service.
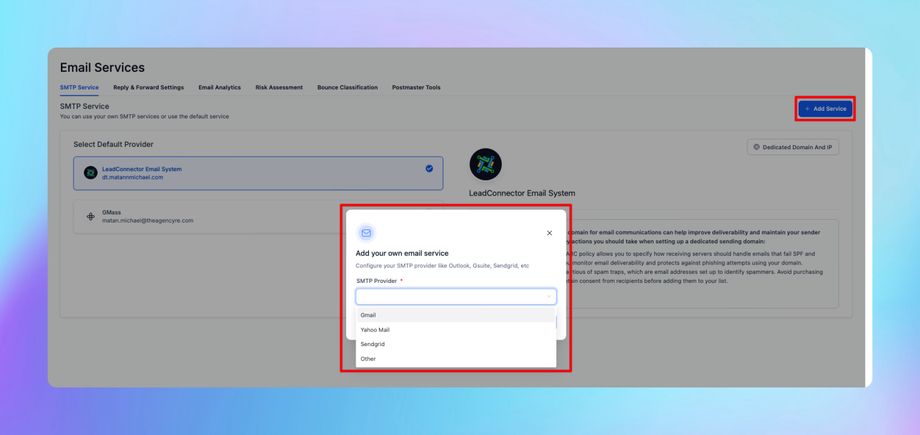
2. Add SMTP Provider:
• Click Add SMTP Service and choose your preferred provider (e.g., Gmail, Outlook, or a custom SMTP).
3. Fill Out SMTP Details:
• SMTP Server: Enter the provider’s server address (e.g., smtp.gmail.com).
• Port: Use 587 (TLS) or 465 (SSL).
• Username: Provide the email address.
• Password: Enter the email password or app-specific password.
4. Authentication Method:
• Choose the appropriate method (TLS or SSL).
5. Test Connection:
• Send a test email to verify the configuration.
6. Save Settings:
• Click Save to finalize.
Notes:
• Ensure the SMTP provider allows third-party connections (check for required app-specific passwords or whitelist IPs).
• Monitor sending limits of your provider to avoid throttling.
2. Reply and Forward Settings
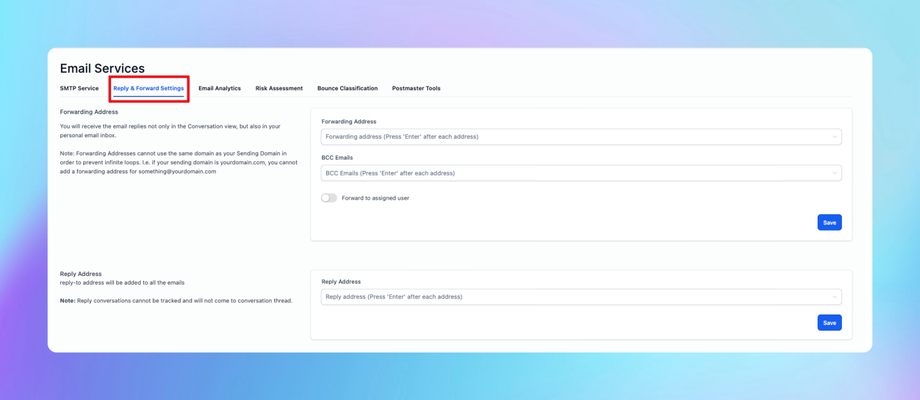
This section enables automatic handling of email replies and forwards, critical for campaigns and user communication.
Configuration Steps:
1. Access Settings:
• Navigate to Settings > Email Services > Reply and Forward Settings.
2. Configure Default Replies:
• Define whether replies should:
• Be forwarded to a specific email.
• Stay within the DealTrail system for automation purposes.
3. Custom Forwarding Rules:
• Set conditions (e.g., forward emails only if they contain specific keywords).
4. Reply Templates:
• Create default reply templates for quick responses.
5. Save Changes:
• Click Save to update the configuration.
Tips:
• Use {{contact.first_name}} merge fields to personalize responses dynamically.
3. Email Analytics
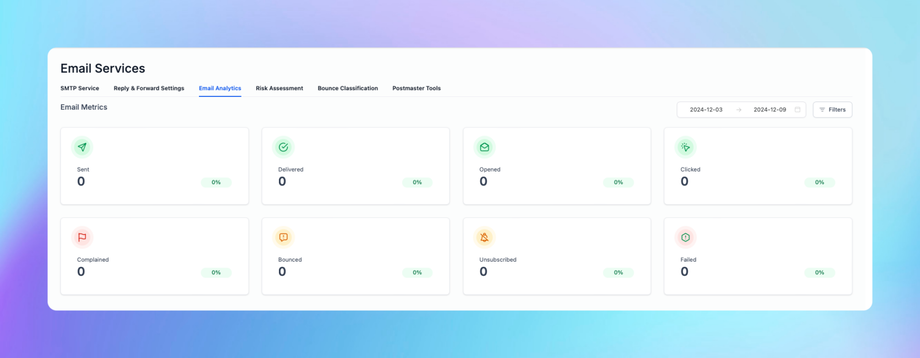
Email Analytics tracks the performance of sent emails, helping users refine strategies for better engagement.
Key Metrics:
• Open Rates: Percentage of recipients who opened the email.
• Click Rates: Percentage who clicked links within the email.
• Bounce Rates: Emails that could not be delivered.
• Unsubscribe Rates: Users opting out from future emails.
• Sent Rates: The percentage of emails successfully sent out of the total emails queued for sending.
• Delivered Rates: The percentage of emails successfully sent out of the total emails queued for sending.
• Complained Rates: The percentage of recipients who marked your email as spam.
• Failed Rates: The percentage of emails that failed to send due to hard or soft bounces.
How to Access:
1. Navigate to Settings > Email Services > Email Analytics.
2. Use filters to view metrics for specific campaigns, timeframes, or recipient groups.
Advanced Features:
• Generate downloadable reports for detailed analysis.
• Segment analytics by tags or lists.
4. Risk Assessment
This feature helps identify and mitigate risks associated with email sending practices.
Steps to Perform a Risk Assessment:
1. Access Risk Dashboard:
• Navigate to Settings > Email Services > Risk Assessment.
2. Monitor Warning Signs:
• High bounce rates.
• Increasing spam complaints.
3. Optimize Practices:
• Use verified email lists to reduce risks.
• Avoid spammy subject lines or excessive links.
4. Set Alerts:
• Configure notifications for metrics exceeding safe thresholds.
5. Bounce Classification
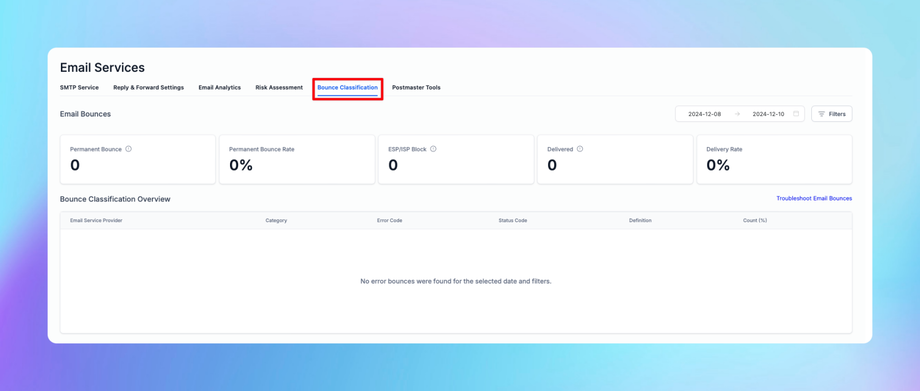
Bounce Classification provides insights into email deliverability issues, categorized as:
1. Permanent Bounce
• Definition: Emails that cannot be delivered due to a permanent issue, such as invalid or non-existent email addresses.
• Use Case:
Identify and remove invalid email addresses to improve list quality.
Prevent repeated attempts to deliver to invalid addresses, protecting your sender reputation.
• Action:
Automatically add addresses with permanent bounces to a suppression list.
• Ideal Rate: Below 1%. A higher rate indicates a need for better list hygiene or email validation.
2. ESP/ISP Block
• Definition: Emails rejected by the recipient’s Email Service Provider (ESP) or Internet Service Provider (ISP). This often results from:
Poor sender reputation.
Violations of ESP/ISP spam policies.
• Use Case:
Detect when your domain or IP is being blocked.
Investigate issues with sender reputation or compliance.
• Action:
Resolve by improving email content, domain authentication (SPF/DKIM/DMARC), and reputation.
Reach out to the ESP/ISP’s postmaster for unblocking if necessary.
3. Delivered
• Definition: Emails successfully delivered to the recipient’s inbox or spam folder.
• Use Case:
Measure the effectiveness of email delivery infrastructure.
Assess your email list quality and sender reputation.
• Ideal Rate: Above 98%. A lower rate may indicate issues such as ESP blocking, invalid addresses, or content flags.
How to Use:
1. Go to Marketing > Emails > Bounce Classification.
2. Review bounce types and affected addresses.
3. Take corrective action:
• Remove hard bounce emails from lists.
• Retry sending to soft bounces after 24-48 hours.
Best Practices:
• Regularly clean and validate your email lists.
• Use suppression lists to prevent repeated sending to bounced addresses.
6. Postmaster Tools
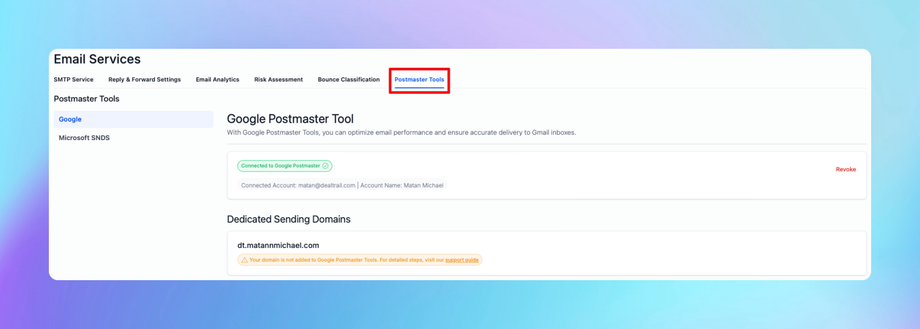
Postmaster Tools provide additional insights for managing domain reputation and improving email deliverability.
Accessing Postmaster Tools:
1. Google Postmaster Tools:
• Visit Google Postmaster Tools.
• Add and verify your sending domain.
2. Data Insights:
• Spam rate.
• Domain reputation.
• Delivery errors.
3. Integrate with DealTrail:
• Navigate to Settings > Email Services > Postmaster Tools.
• Link verified domains for centralized management.
Maintenance Tips:
• Check Postmaster insights weekly to ensure a positive reputation.
• Align DKIM, SPF, and DMARC settings for optimal deliverability.
Additional Notes:
• Ensure compliance with CAN-SPAM and GDPR regulations.
• Monitor analytics and refine campaigns regularly for improved performance.


