🔎 Creating and Editing Custom Objects
Only admins have create, update and delete access for Custom Objects. Users have read-only access to view details but they cannot make changes to Custom Objects.
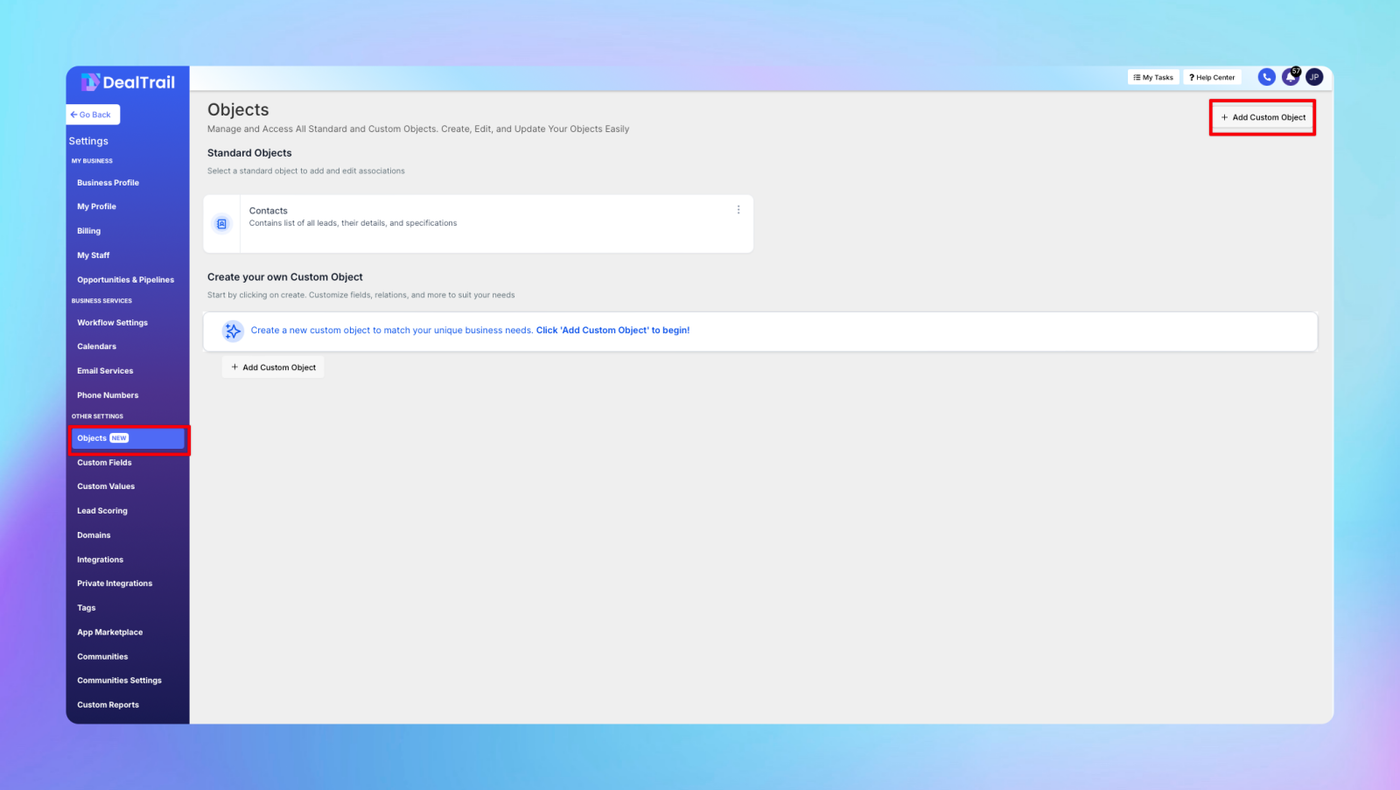
Step 1: Create Custom Object
Go to Settings > Objects then Click on "Add Custom Object"
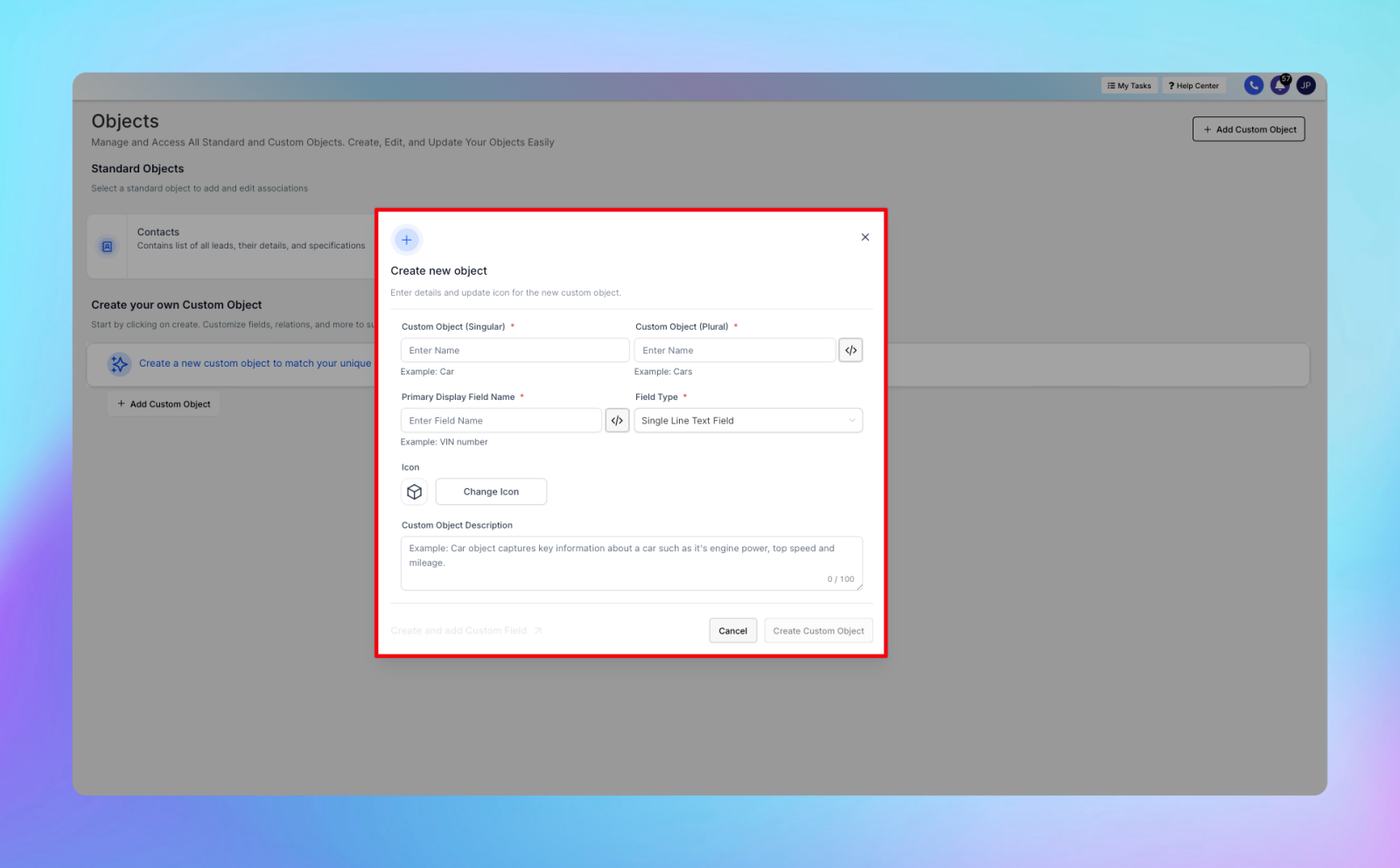
Step 2: Add Details about Custom Object
-
Mention the singular name of the object e.g. Pet
-
A plural name of the object should be added e.g. Pets
-
Internal Name of the object and the primary field is created by default - it can be edited by clicking on the "</>" icon and updating the internal name.
-
Add a name for the primary display field name - e.g. Pet Name, Pet Identification Number
-
Add an icon to easily identify the custom object
-
Also - add a description to the object to help anyone understand what the object signifies.
-
Click on "Create Custom Object"
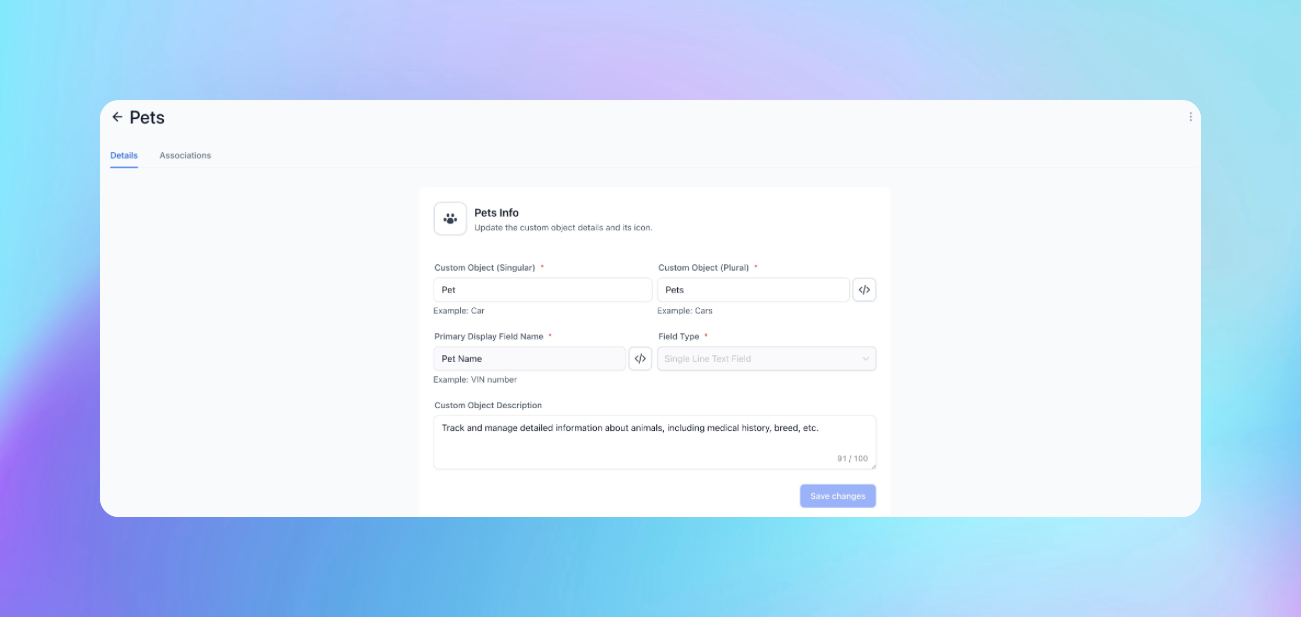
Step 3: Editing a Custom Object
-
Once the Custom Object is created, the custom object will start appearing on the same page.
-
You can click on any of the Custom Objects to start editing its details.
-
Note that the primary display field and the internal names cannot be edited once created.
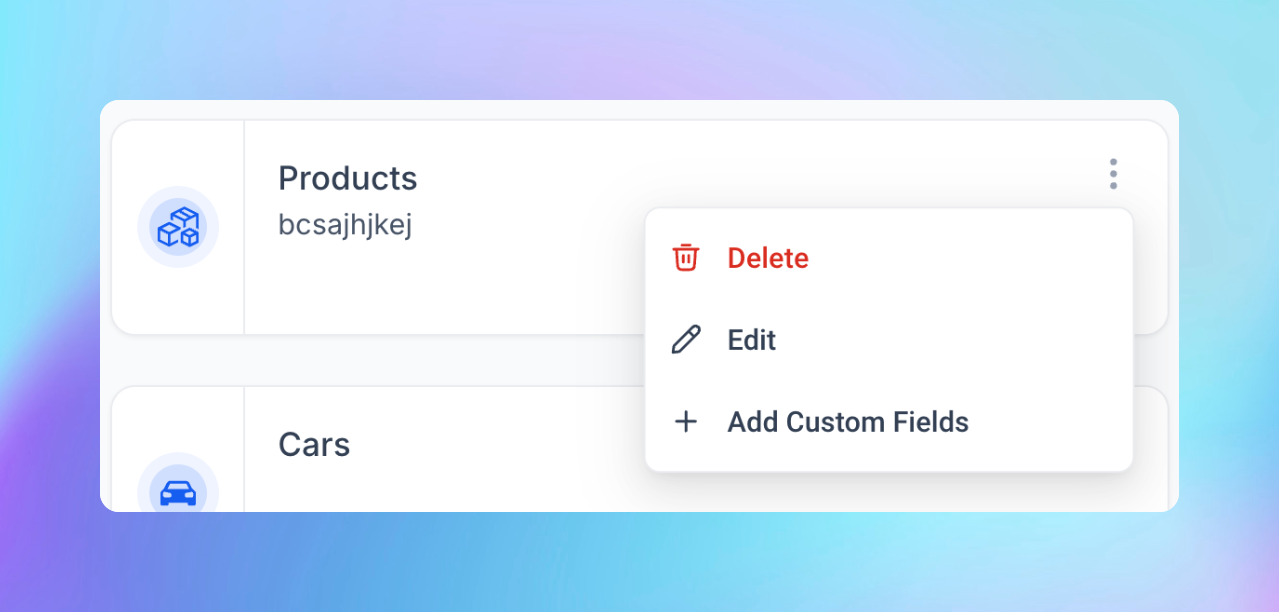
Deleting a Custom Object
-
Click on the 3 dots near the custom object name
-
Select "Delete" from the dropdown.
-
Type "DELETE" in the text box and confirm deletion.

- The custom object is now deleted.
Note: Deleting a custom object is an irreversible action. Once a custom object is deleted, all its records, associations, workflows and custom fields will be deleted and cannot be recovered anymore.