📄 Adding Custom Forms to Calendars
Setting Up Custom Forms for Calendar Bookings
Overview
This guide will walk you through the process of setting up a custom form for your calendar bookings, enabling you to collect additional information beyond the basic details (first name, last name, email, and phone number).
Instructions
1. Add Custom Fields
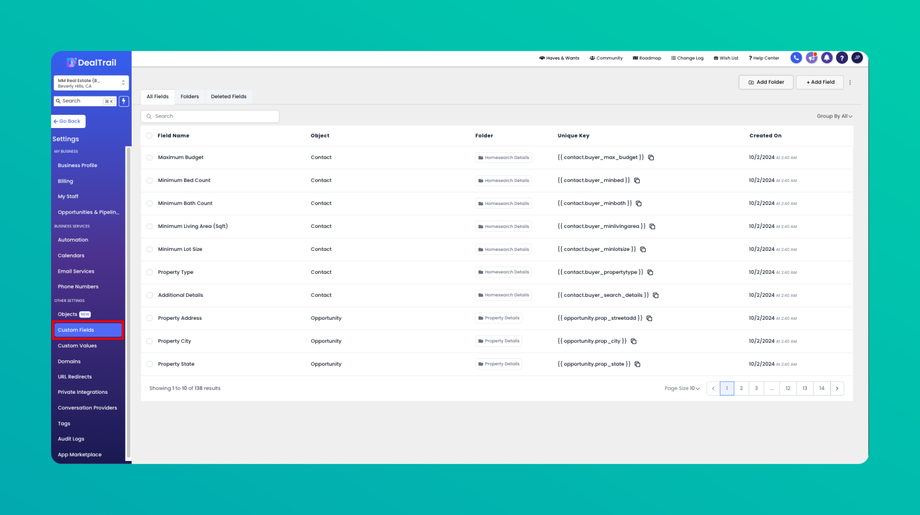
• Navigate to Custom Fields: Begin by accessing the Custom Fields section from Settings.
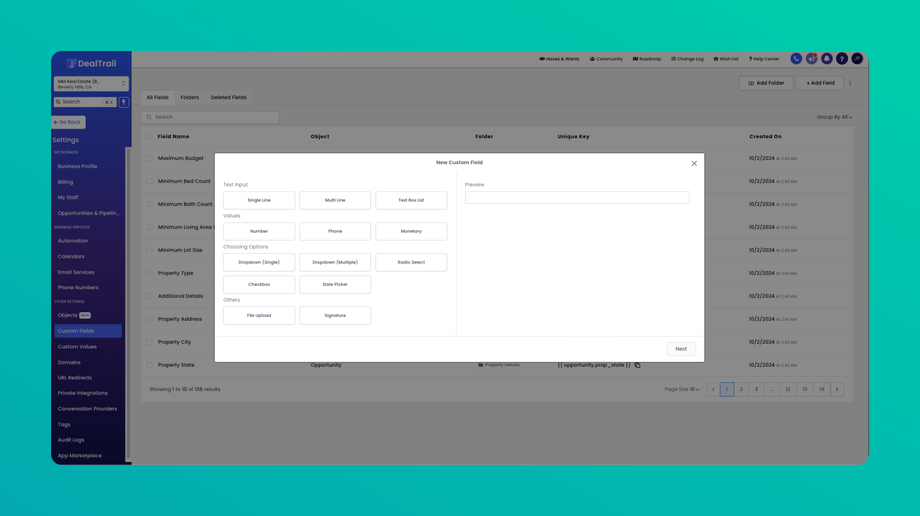
• Create New Fields: Add the additional fields you need. For example, you might include fields for ticket number, call topic, or any other relevant information.
2. Create a Custom Form
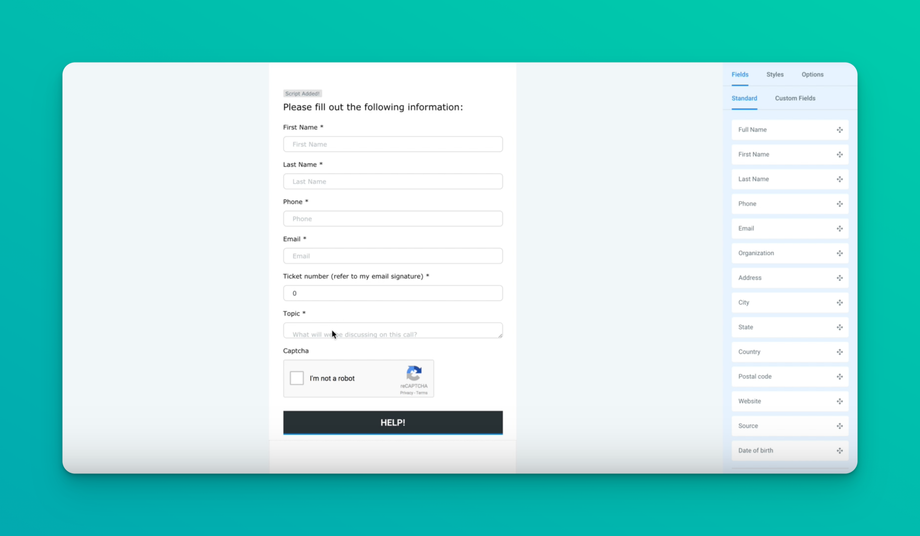
• Go to Form Builder: Access the Form Builder tool.
• Design Your Form: Create a new form or modify an existing one. Drag and drop the custom fields you created into the form. Include essential fields such as full name, first name, last name, phone number, ticket number, and call topic.
3. Configure Calendar Settings
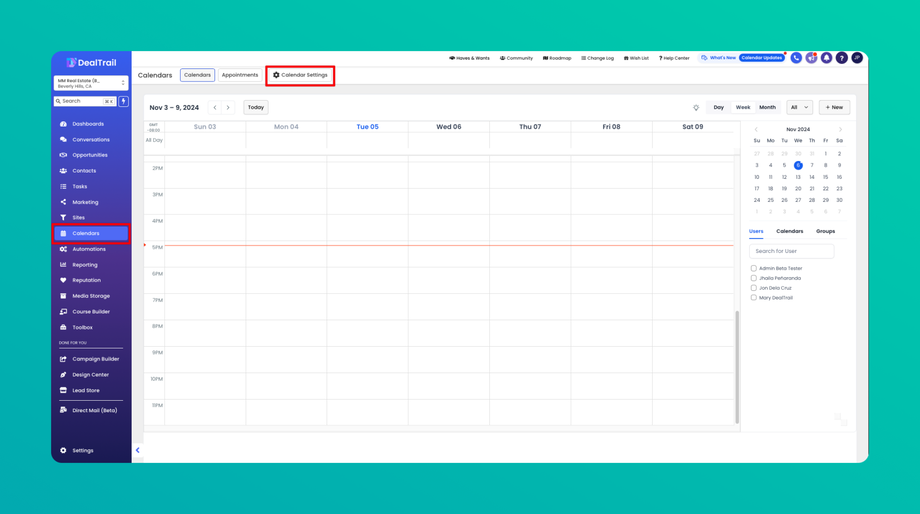
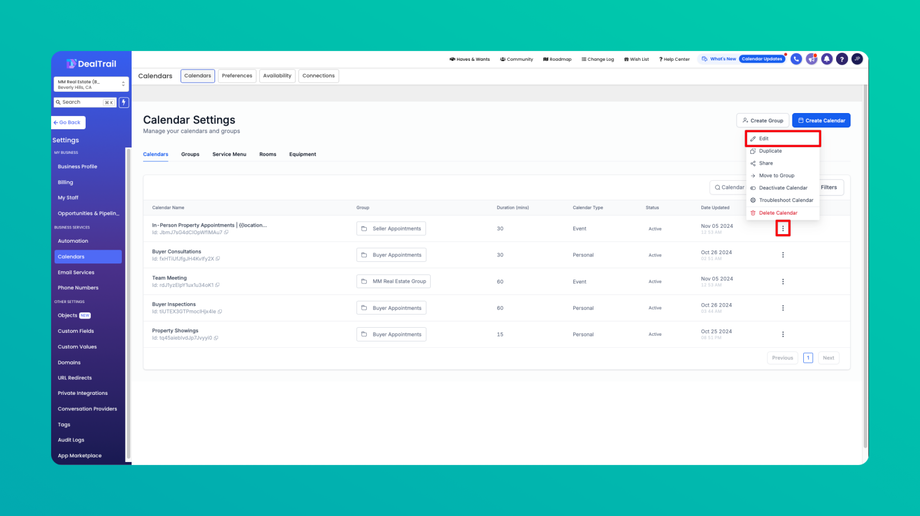
• Open Calendar Settings: Navigate to the Calendar Settings section then select Calendar you would like to Edit.
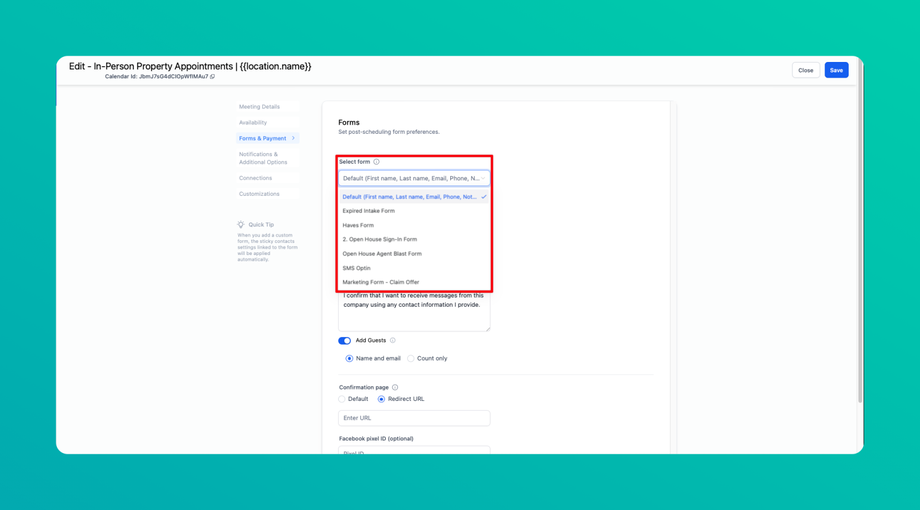
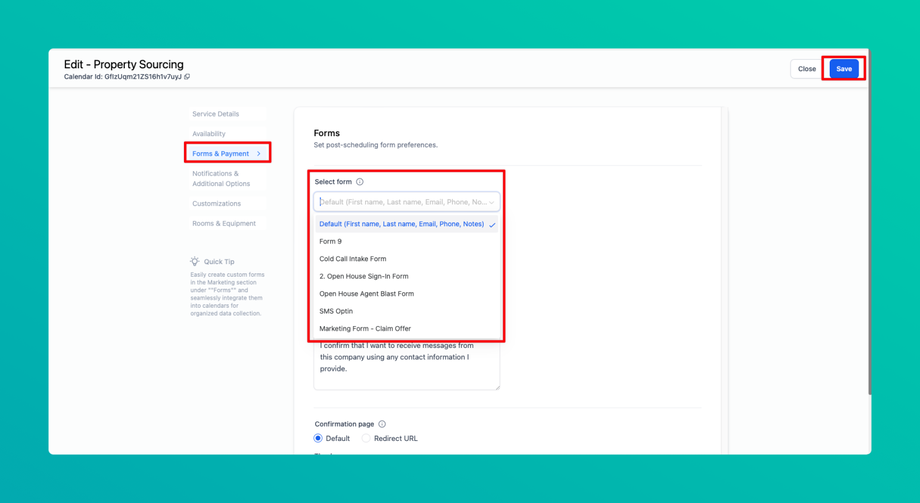
• Select Your Custom Form: Choose the newly created form from the dropdown menu in the custom form settings under Forms & Payment and save your changes.
4. Verify the Form Integration
• Test the Calendar Page: Visit the calendar page where appointments are scheduled.
• Check the Form: Ensure that the custom form appears with all the fields you configured. Users will need to fill out this form completely before finalizing their appointment.
Additional Tips
• Make sure to include all required fields in your custom form to avoid missing important information.
• Conduct a test booking to ensure the form appears correctly and functions as expected.
Customizing Calendar Forms
Overview
We are excited to announce a new feature allowing you to customize the form on your calendar. This enhancement will enable you to integrate custom forms into your calendar scheduling process, making it more tailored to your needs.
Steps to Customize Calendar Forms
1. Access the Form Builder
• Navigate to the Marketing section.
• Locate and open the Form Builder. If you’re unfamiliar with it, the Form Builder allows you to create various drag-and-drop forms.
2. Create Your Custom Form
• Use the Form Builder to design your custom form. For example, you can create a form labeled “Brochure Request” with fields such as First Name, Last Name, Email, Phone, and a Download button.
3. Integrate the Form into Your Calendar
• Go to the Settings section.
• Select Calendars from the options.
• Find the calendar you want to customize and click the Edit button next to it.
• In the Select Form dropdown under Forms & Payment, choose the form you created.
• Click Save to apply the changes.
4. Verify the Integration
• Open the calendar and schedule an appointment.
• You should now see your custom form displayed. For example, the “Brochure Request” form will appear, and users will need to fill it out to complete the scheduling process.
Benefits
• Enhanced Customization: Tailor the scheduling experience to your specific needs.
• Improved User Experience: Collect relevant information directly through the calendar.


